
For decades 3D printing has been available in some form, but it wasn’t until the likes of MakerBot and other startups who began producing affordable hardware for the hobby to really take off. In the past decade or so 3D printers have also come a long way, ranging from thousand dollar units all the way down to do-it-yourself builds that practically anyone can afford. One such DIY printer line comes from Anet, a Chinese manufacturer, who has 3D printing kits that cost under $200 and generally receive praise from the community.
We decided to get our hands on the Anet A8, a simple DIY 3D printing kit that just requires some nuts, bolts, a bit of patience, and best of all no soldering. Over a weekend I put on my safety goggles, spent more time peeling contact paper off the acrylic then building, and got my hands to work on the build. After some self-created bumps the printer got up and running, so let’s dig in and see how it all turned out.
Building the 3D Printer…Drunk
If you missed our review of the AlcoMate breathalyzer, you can consider that part one of this review. Since we didn’t have a lab handy I decided to start throwing back wine and tequila, testing my BAC, and seeing how that affect the build. Long-story short, I messed up, a lot. Fortunate it was easy to fix the next day, and ultimately the only thing stopping the printer from doing it’s thing was adjusting a small sensor on the front. Drinking aside, the Anet A8 was relatively easy to put together; however, the instructions are sort of terrible. So go ahead and throw those out and just watch this YouTube video instead.

The biggest pain you’ll run into besides the bad instructions is all the contact paper that protects the acrylic. That took a good two hours, and eventually I just gave up and left it on some of the pieces. Beyond that everything was just a matter of taking my time, going piece by piece, and when it came to wiring and plugging it in, crossing my fingers and hoping it didn’t catch on fire. You’ll also want to take some time to ensure the extruder and heated bed are leveled properly. To do this, just screw/unscrew the bolts in the bed, and also adjust where the left-side sensor is placed because that’s what tells the extruder where to go. This is where I messed up and it started to drill into the bed, it wasn’t pretty.
Overall building the Anet A8 was a fun weekend project. I certainly can’t recommend doing it while drinking, but if you want a family project this is definitely a good one.
Printing and Functionality
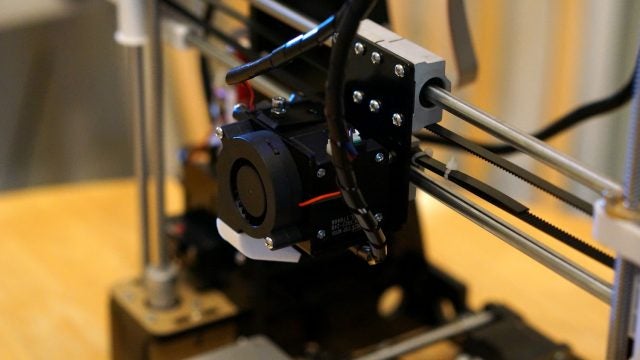
The Anet A8 may be an entry-level DIY 3D printer, but the quality of its output is quite high. The biggest hurdle you’re going to face with this particular machine is that you’ll need to tweak, adjust, and fiddle with the software settings to get it to print just right, and that’s mostly due to the DIY component. For pre-built machines there will be less fiddling and more of a focus on the software and design side. With that said, here are the basics of what you’ll get with the Anet A8:
- Filament types: ABS / PLA / Wood / Nylon PVA / PP / Luminescent
- Printing volume: 220 x 220 x 240mm
- Printer speed: 100 mm/s
- Nozzle diameter: 0.4mm
- Layer thickness: 0.1-0.3mm
- XY-axis positioning accuracy: 0.012 mm
- Z-axis positioning accuracy: 0.004 mm
- Supports G-code, OBJ, STL
- Unit size: 510 x 400 x 415 mm
- Unit material: Laser cut acrylic
- Unit weight: Under 19 lbs
From this, what you’re seeing is that the Anet A8 will be able to print relatively tall, full-sized objects with fine details, and it can use either plastic, nylon, and wood based materials. The more I used and tweaked the machine, the better the outcome from the printer. From the two example videos you can tell these are pretty basic objects, but in a test print using this poodle design it came out great with the exception of a few extraneous hairs hanging from the tail and muzzle. With a bit of sanding it came out looking awesome.
Besides the hardware, there is some free software you’ll want to use to either convert designs over that will work with the Anet or build them right in it. For a WYSIWYG editor that allows you to manipulate shapes and add letters, check out Tinkercad. That particular tool also makes it relatively easy to scale and tweak existing designs on a basic level. For ensuring the design is then formatted and programmed to print with the Anet’s specs, you’ll then want to use Cura. Using the Anet A8’s settings and adding the design will allow you to export it to the micro-SD card which will then be read by the hardware. There are of course other design tools like Autodesk’s CAD and other open source platforms, but these are the options we went with in the tests and then used some guy on Fiverr for a custom pug.
The hardware setup and build was relatively straight forward, but the navigation and user interface for the machine was both outdated and a pain. Using a D-pad of sorts, you’ll probably find yourself poking around at the different options trying to figure out which thing does what. Essentially all you need is the send to home for tweaking where the extruder sensor and hot bed should rest, and the other is getting to the print file on the SD card and printing it. The buttons are fine, though a bit unresponsive at times, trying to figure out where to print and tweak setting was a pain.
Another thing worth noting is that while there is supposedly an easy to add filament feature on this with a quick release, I found that it required a bit of disassembly to actually get it back in. I also managed to clog the filament nozzle, which is common, and it just required a bit of pre-heating and a tiny screwdriver to unclog it. Otherwise the printer is still churning out designs without problems, and getting better with each version.
We typically also look at the design of items we review, but since we put it together that’s on us. The materials used within the kit though are easy to work with, and the structure of it uses laser cut acrylic so it’s durable. Our particular kit left out a bag of metric screws though, fortunately all of the sizes are listed within the instructions and we were able to find them at Lowes.
Overall we found the quality of the 3D prints to be great, but because this is a DIY piece of hardware it will take some patients and tweaking. Don’t expect highly detailed designs to come out exactly as you’d like them to with your first few designs either, as the more you use it and familiarize yourself with the settings the outcomes will be more ideal. Besides some user-error, the Anet A8 is both fun and educational.

Pros and Cons
Highs
- Generally easy to build
- Extremely affordable
- Baller open community
- Print quality is good, may need some sanding
Neutral
- Don’t let Elliot build it for you while drinking
Lows
- Instructions are a mess
- User-interface is from the 80s
- Adding filament to the extruder is a pain
Overall Thoughts
Should you buy and put together the Anet A8? If you’re looking for an affordable way to get into 3D printing, definitely. If there is one thing that I quickly learned after doing some research, it’s that the Anet and 3D printing community is quite vast. Even as someone with minimal design skills I was able to still tap into the open sourced designs that were available, messed around with some WYSIWYG creators to make my own, and even upgraded the components on the machine itself. At the price point the Anet A8 feels well worth the offering, especially as someone who has no fear of Ikea furniture. We give the Anet A8 a 4.5 out of 5 for its price, general ease of building and printing, but a few dings due to having sort of terrible instructions without the community.
Price: $164* ($155 on GB with code GBA8US)
Where to buy: Gearbest, Amazon
*This kit does not come with filament. If you plan on doing a bunch of prints, this is the kind we used in our tests and it worked great.
Read more gear and gadgets reviews at Tech.Co