WordPress makes building a new website easy and inexpensive. If you’re looking for a business website, we’d recommend Shopify first, for its sales and reporting tools as well as top-notch integrations.
WordPress makes a great blog or resume website, however, since it has a good commenting system and easy-to-understand website themes. Getting started just involves starting an account, picking a plan, and setting up your website pages, among a few other steps. For a broader overview, check out the best ways to make a website to find the method that best suits your needs.
Read on for all the steps to build a website on WordPress, as well as extra tips on how to make it the right fit for your business.
Can I Use WordPress for Free?
Yes – there’s more than one way to create a WordPress for free. WordPress’s standard website builder – commonly known as WordPress.com – has a free plan, but it’s extremely limited. You’ll only really be able to build very basic sites with it, and you won’t be able to customize your domain name – although that won’t bother everyone.
You can download the source code for WordPress.org for free, but you’re going to need to pay for add-ons, plug-ins, and a variety of other features while you build your website from the ground up.
Unsure of the difference between the two versions of WordPress? We’ll explain in the next section…
WordPress.com vs WordPress.org: Know the Difference
Before you get started, it’s very important that you don’t mistake the WordPress.org and WordPress.com when building your website. There are some serious differences worth noting, and mixing them up could be a big obstacle for your future page.
To put it as simply as possible…
- WordPress.com is a standard website-building package that includes hosting and security measures.
- WordPress.org is its more customizable platform that requires significant technical know-how to get a site online.
How to choose between WordPress.com and WordPress.org
People who aren’t very technically proficient or are entirely new to building a website are probably going to want to stick with WordPress.com. It’s the far easier route, providing users with built-in hosting functionality, so you don’t have to provide your own performance and security maintenance to operate your site.
Starting a site using WordPress.org is more of a do-it-yourself process that includes getting a third-party hosting service. You simply download the source code for WordPress.org for free, connect your hosting provider, and you can build a site that way. As a result, though, your site performance, speed, and security are heavily reliant on your hosting provider, as well as your own maintenance.
This all means WordPress.org is generally favored by businesses with complex website needs and the budget for technical support staff. and, as mentioned in the previous section, using WordPress.org will still cost money because you’ll have to pay for the hosting provider. It does give you access to the WordPress interface for free, though, so that’s something.
1. Select a WordPress plan
In most cases, you’ll want to start with the Free plan in your WordPress journey. It has some serious limitations for long term use, most notably that you don’t get a custom URL, so you’ll have a lot of trouble getting discovered. Even with those limitations, though, you’ll be able to design the majority of your site and get a feel for the interface before making a financial commitment.
We started out with the free plan and found that changing to a paid plan is obviously quite easy. In addition to the regular pop-ups on menus that have features behind a paywall, there’s an Upgrades section available that clearly outlines the different pricing options for your site.
WordPress.com offers six different plans: Free, Starter ($4 per month), Explorer ($8 per month), Creator ($25 per month), Entrepreneur ($45 per month) and Enterprise (custom quote). As you can tell from the names, they each serve different purposes, creating content to selling products with an online store.
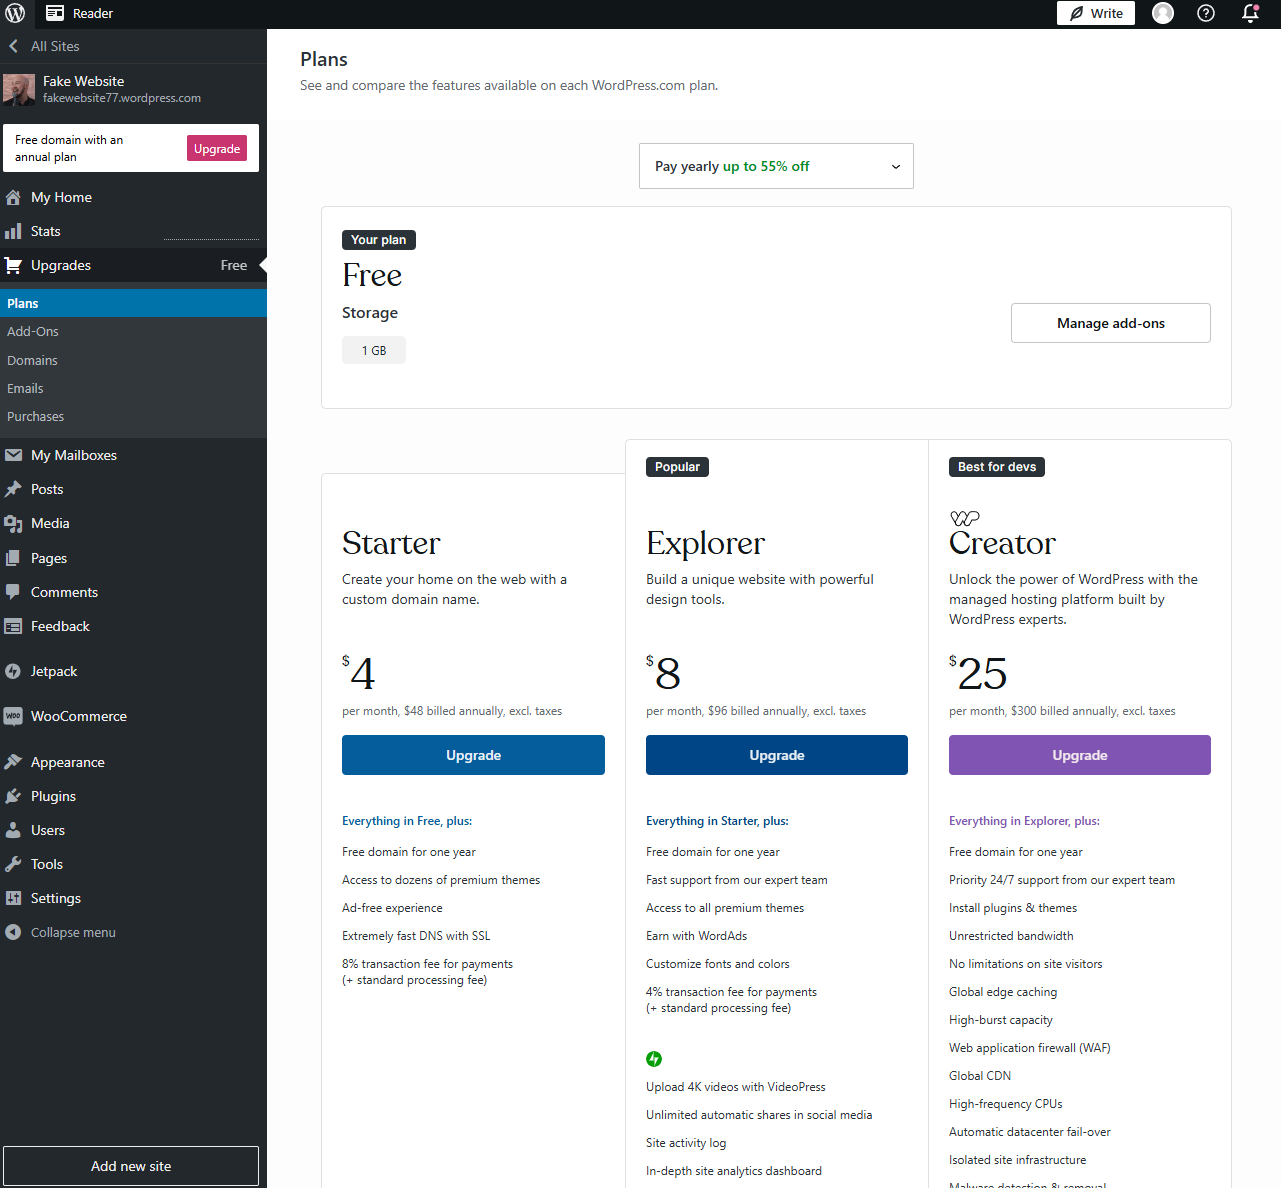
Understandably, WordPress makes it easy to upgrade to paid plans from the free plan. Source: Tech.co testing
2. Claim your domain
Before you actually start building your website, you decide on what your domain name is going to be. If you’re sticking with the free plan, your domain name will feature WordPress branding, but if you opt to upgrade, you’ll be taken to the Claim your domain page, which allows you to search for available URLs that you can use.
When choosing your domain, it’s important to keep it simple. This will be the web address by which your potential visitors will find you, so you’ll want to make it memorable and short, to prevent any potential spelling errors. You’ll also need to make it unique, given that there are 810 million WordPress websites out there that you’ll need to differentiate yourself from.
It’s also worth noting that different domains will cost varying amounts of money, depending on how popular they are. Specific domain extensions (like .site and .online) can be particularly expensive, depending on what you’re looking for, with prices we saw getting as high as $1,200 per month.
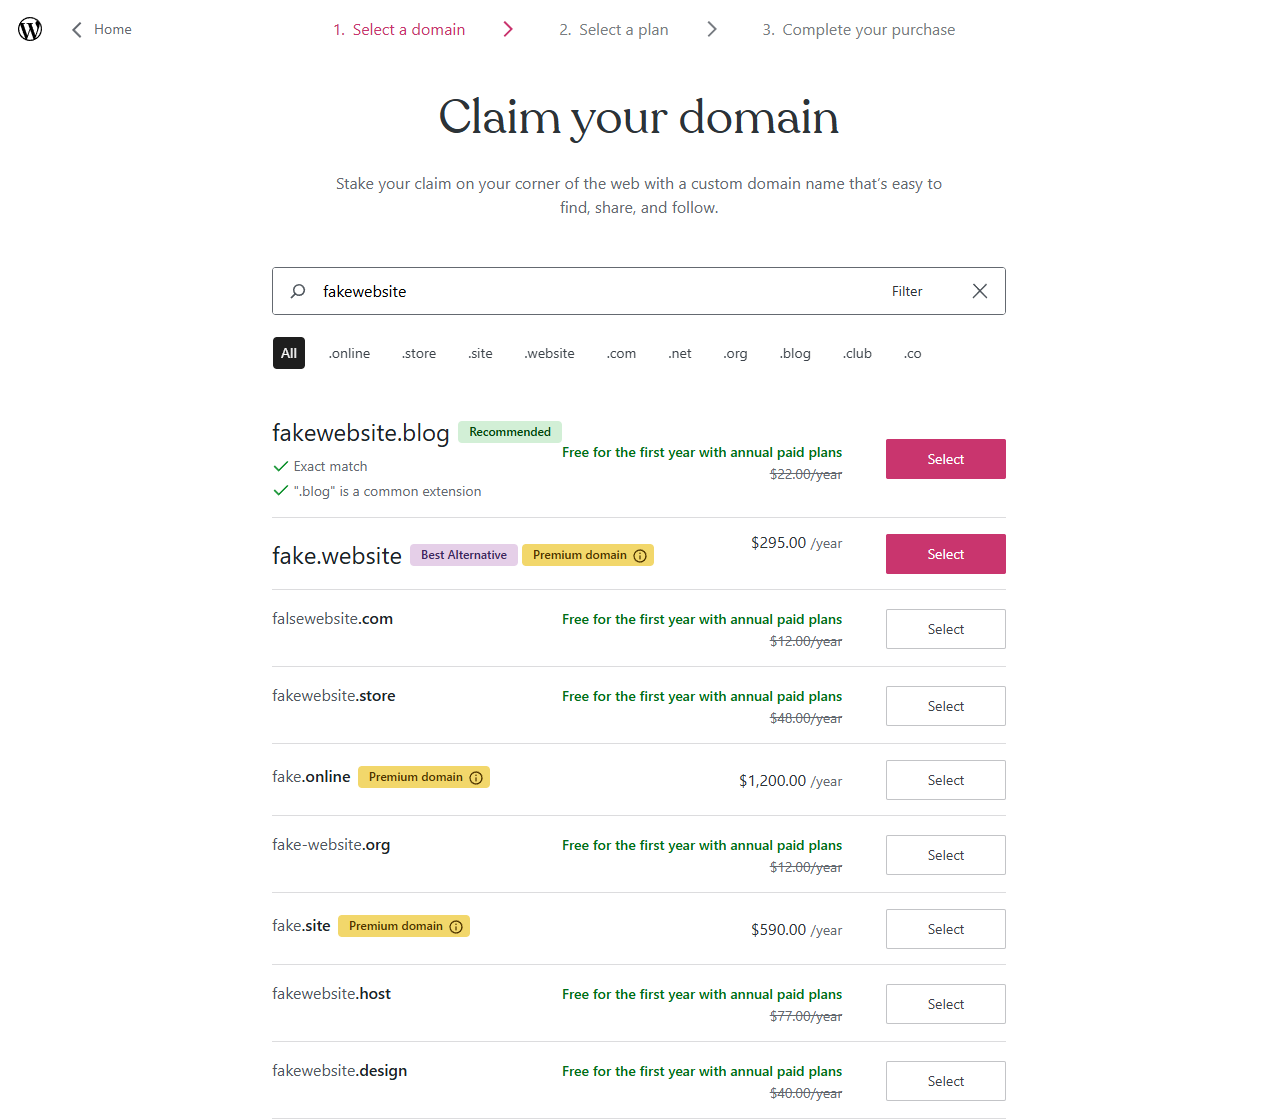
WordPress domains are free for the first year with paid plans, and lets you choose between a lot of options. Source: Tech.co testing
3. Pick a theme
You’ll stand out for all the wrong reasons if you keep the standard theme that WordPress gives all new users: Instead, opt for a free or paid custom theme by selecting Appearance on the left-hand column in your main dashboard, and then selecting Themes.
Premium themes are available starting with the Premium plan, and they’re a good way to establish your website’s visual appearance. Just click Install once you know which you want. Be sure to test out what the theme looks like on a mobile device.
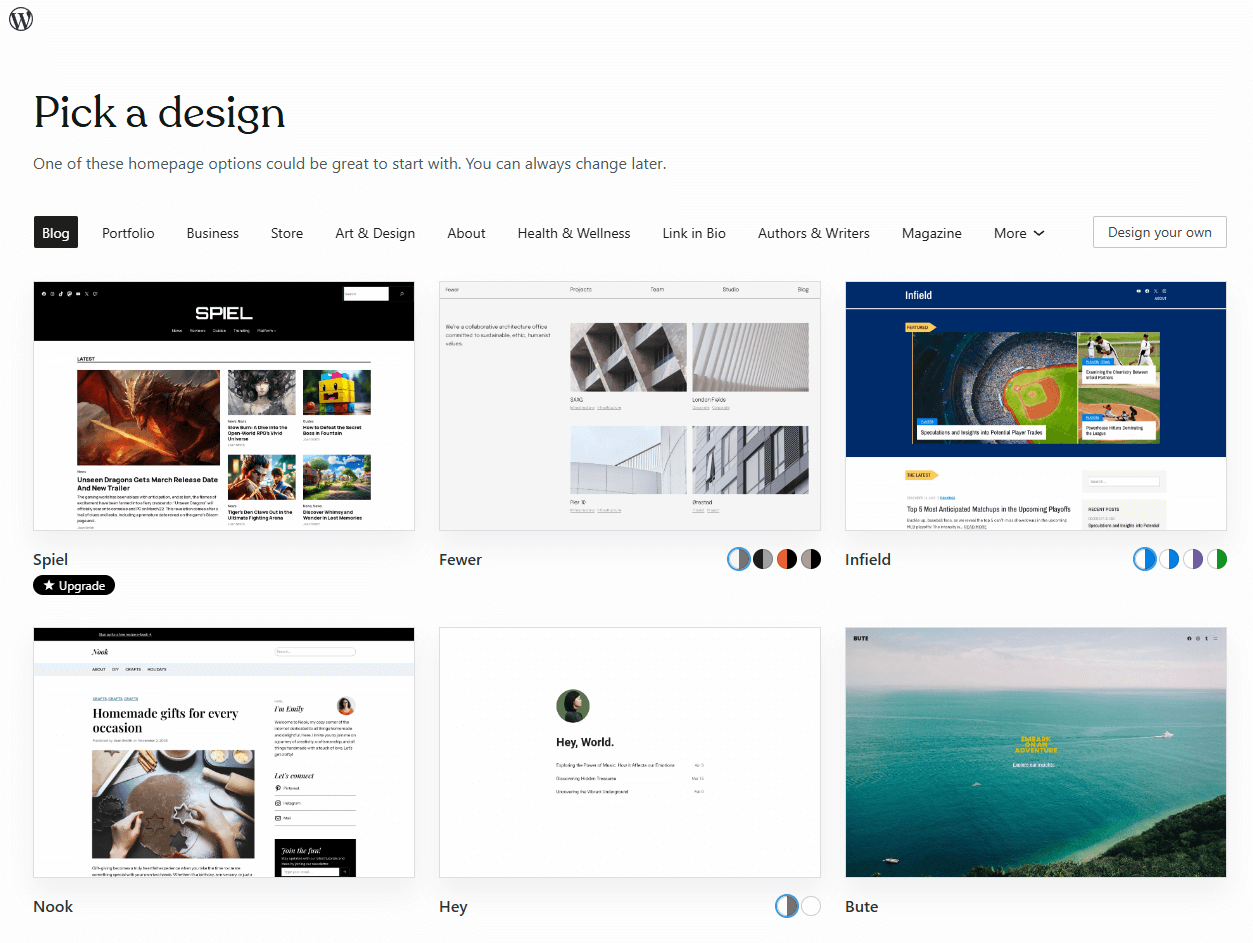
We were surprised that WordPress has many themes that aren’t just for blogging. Source: Tech.co testing
4. Customize your theme
Installing your theme isn’t everything: You also need to customize it. Click the Customize section in the Appearance navigation bar to launch the editor that allows you to change your theme settings. A live preview of the website is available, which we found helpful for getting an idea of what the changes will look like.
Don’t spend forever on the process, since most users won’t need anything special. If you aren’t a design agency or an upscale restaurant, your visitors aren’t going to notice a fancy theme.
Looking for enhanced customization? Check out our WordPress vs Webflow guide now
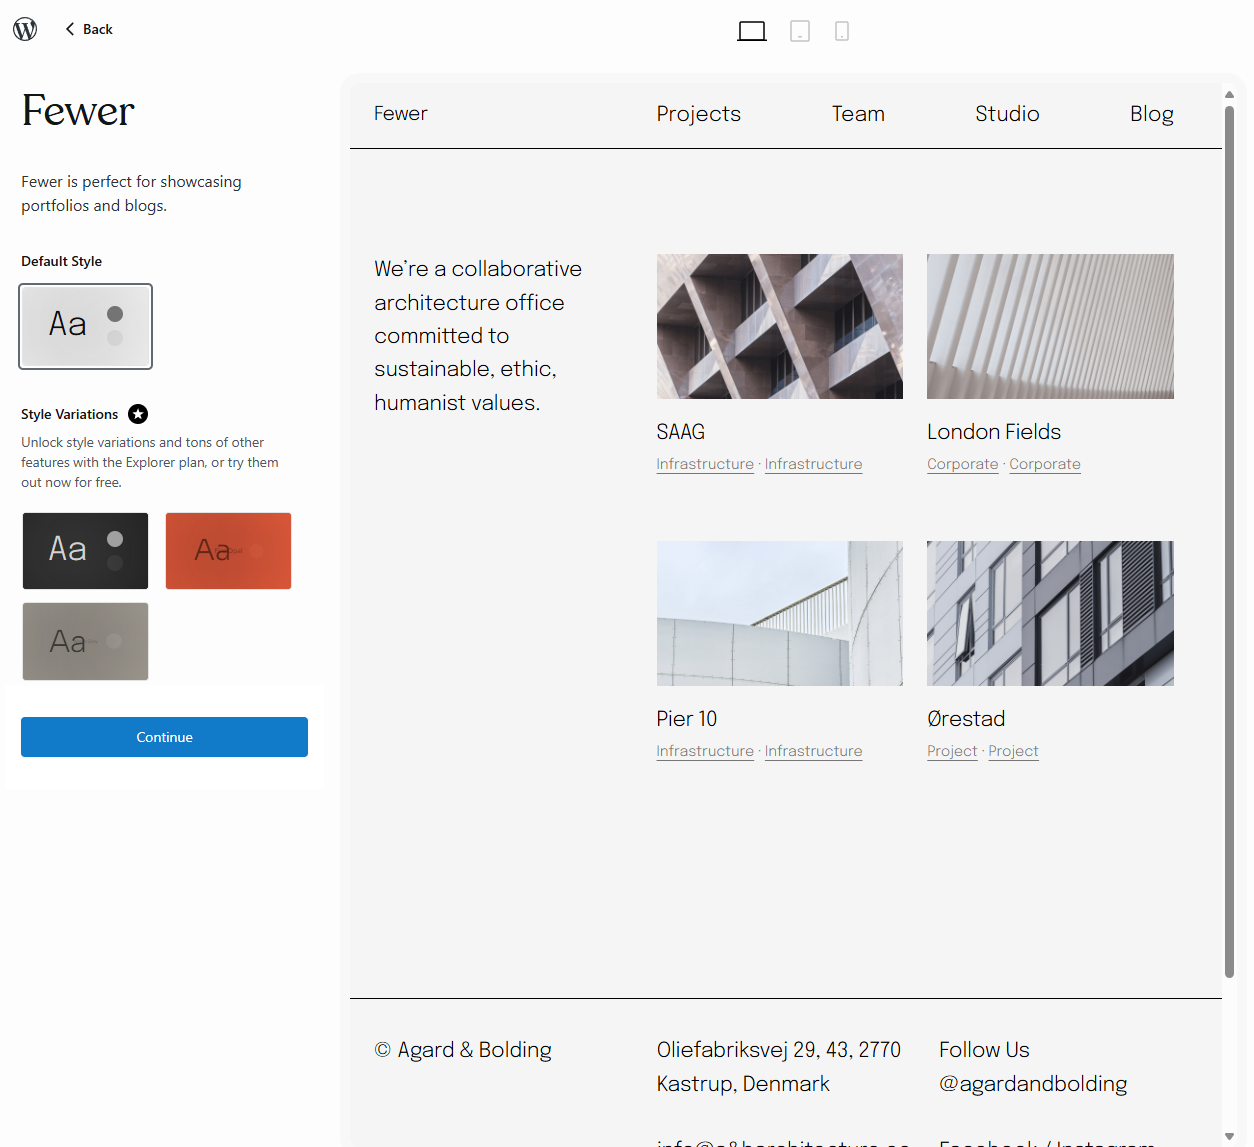
We were able to thoroughly customize our theme, but some options did cost extra. Source: Tech.co testing
5. Create pages
Everything on a WordPress website is either a page or a post. What’s the difference? A page is static, a basic building blocks of a website, and all websites will need at least a small handful.
Typical pages on a website might include a main homepage, an “About Us” page, and a “Contact” page, as well as more specialized pages, like a restaurant menu or a blog page to store all your posts. Just three or four pages is common for many simple websites.
To create a new page, select Page from your dashboard navigation bar, and then click Add New. Add the text and images you need, and then click Publish or Save Draft.
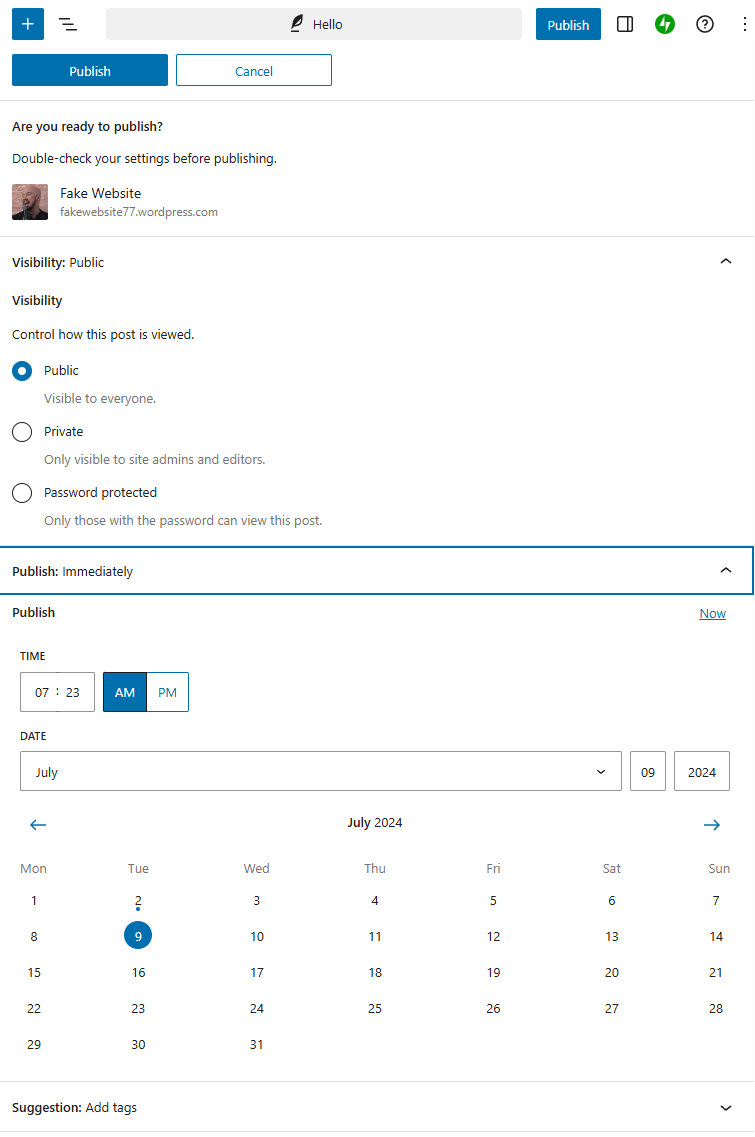
The publishing experience for pages and posts is comprehensive, with lots of options to get your post live. Source: Tech.co testing
6. Add posts
In addition to the static Pages on your site, WordPress also enables users to add Posts, which are not as integral to the infrastructure of the site but are instead regularly changing pieces of content that are featured on various pages.
For a blog site, for example, Posts would be considered the actual blog entries that are posted on the site. You can add as many as you want and the most recent Posts will appear at the top of the page by default, and you can view each category, Published, Drafts, Scheduled, and Trashed.
We found that you can also organized Posts into different categories and can be assigned a variety of different tags, allowing you and your visitors to find similar content across your site.
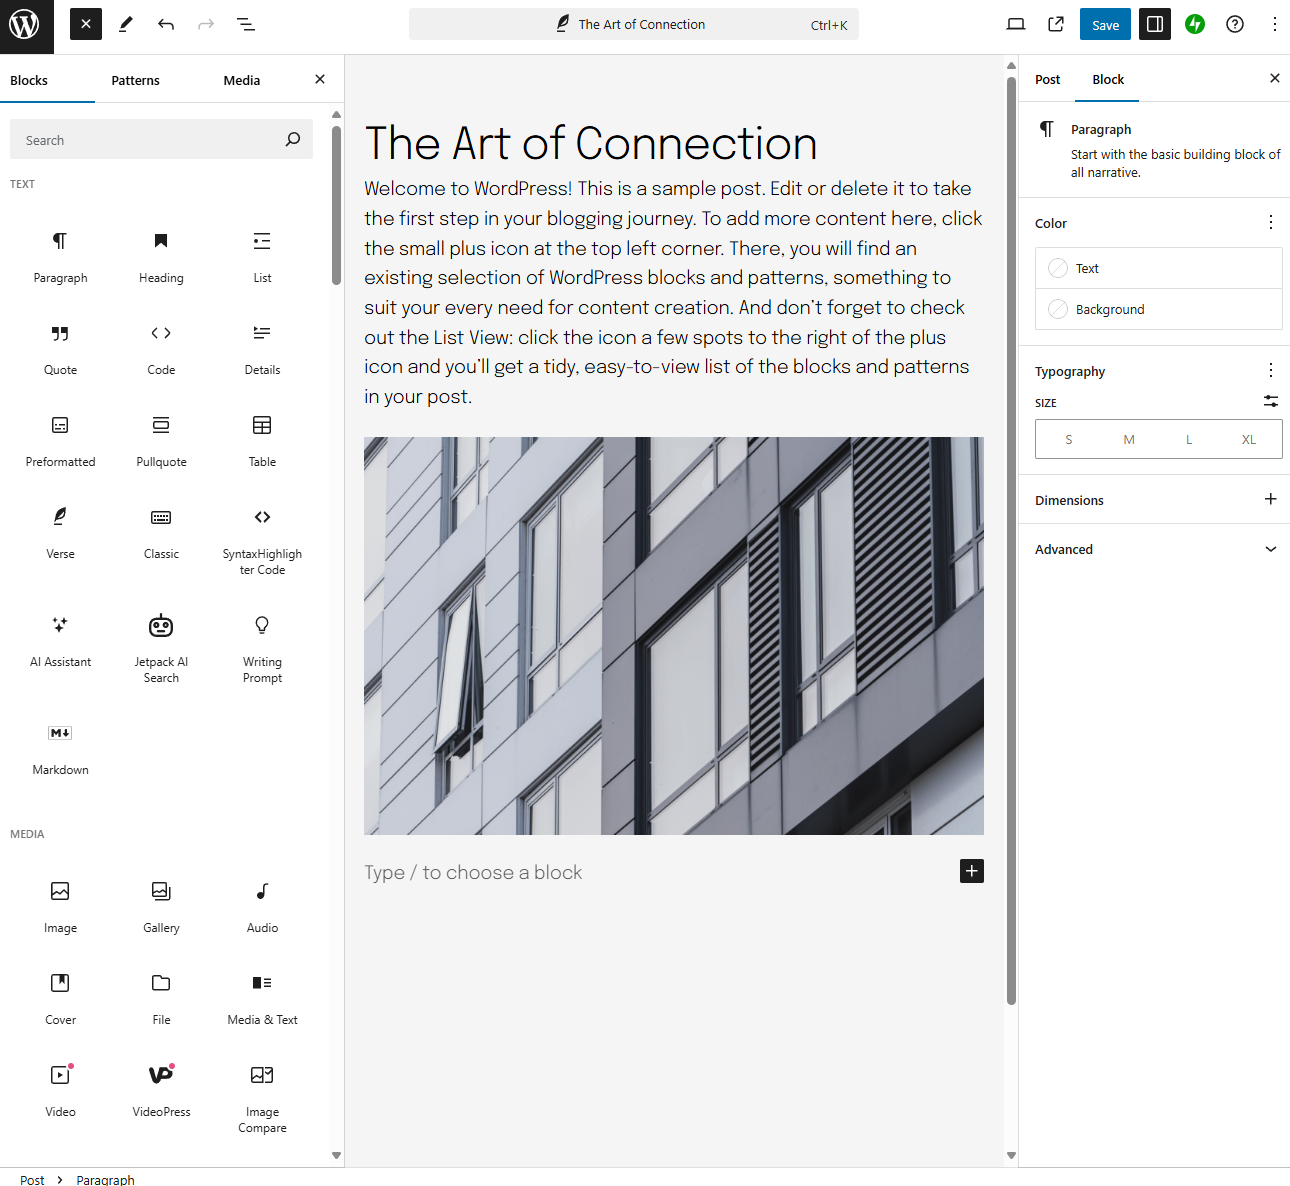
The interface for adding and editing posts was comprehensive, allowing for lots of components to be easily added. Source: Tech.co testing
7. Explore plugins
A WordPress plugin refers to an application from a third-party web developer that’s designed to “plug in” to your WordPress website. Once installed, it will add a new feature to your website, and you’ll be able to edit it from within your WordPress account, just as you would with any built-in feature.
Plugins are easily accessible, too. We just had to go to the main dashboard, click the Plugins button visible on the left-hand side navigation bar. You can then search by keywords to pull up possible plugins to add. Some of the most useful types of plugins are:
- Ecommerce
- SEO
- Security
- Anti-spam
- Lead generation
- Contact form builder
Don’t worry about adding any right now if you can’t think of any that you need, particularly because they will cost you extra to have them installed. All that additional functionality is available if you need it, though.
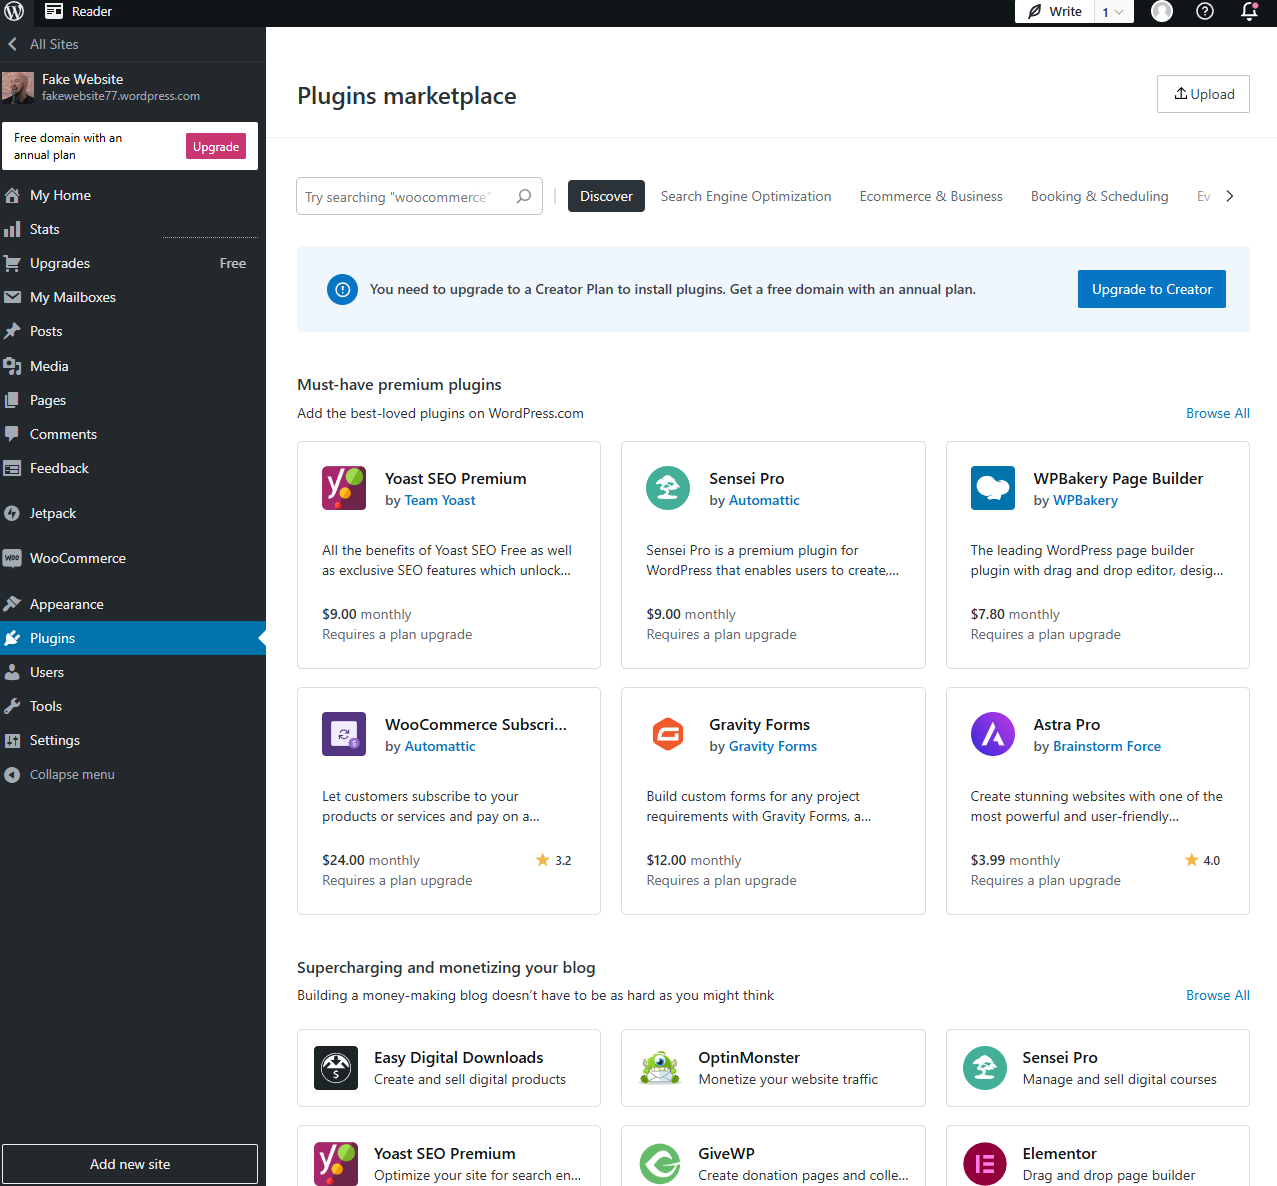
We found WordPress works great because it offers a bounty of plugins to do even more. Source: Tech.co testing
8. Review your website
Once you’re ready to go, take a trip through your website as if you were a new visitor. If anything seems unclear, change it. You can visit similar websites to see how they’re set up as well. Some final tweaks might include integrating your social media platforms, or experimenting with new plugins that are fun rather than completely essential.
Once you’ve had a few visitors, be sure to check out the Stats dashboard, available near the top of the left sidebar menu. This will give you a clear picture of who is visiting your site, who is commenting on your content, and other important stats about your pages. This allowed us to further optimize our site so that we can grow with our audience.
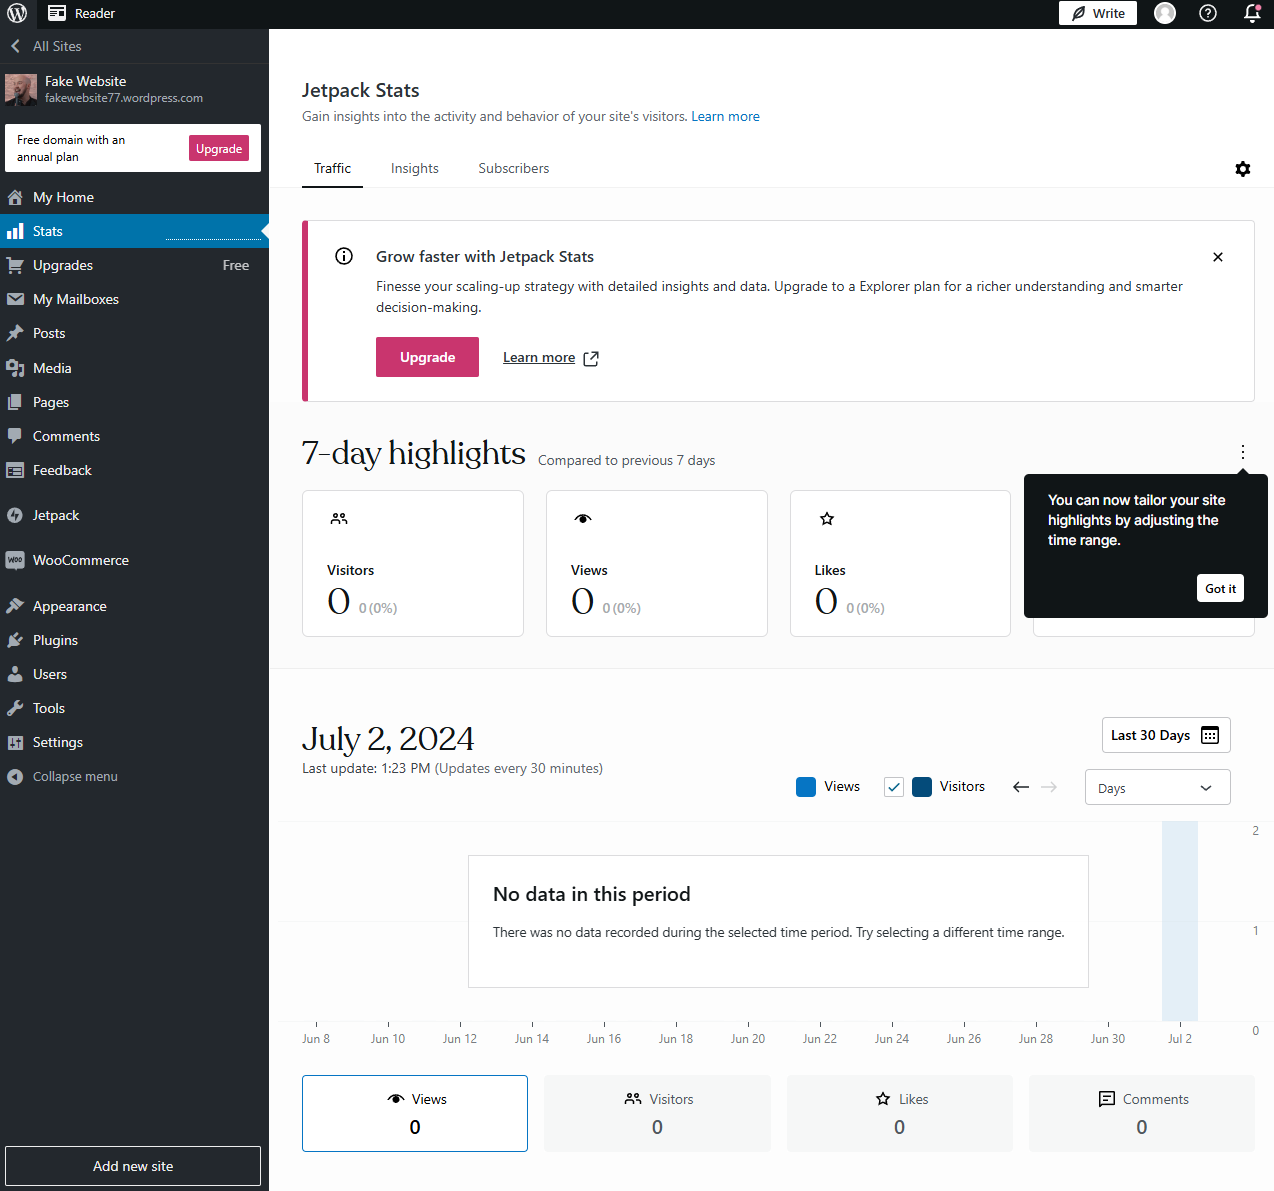
We always knew how well our site was doing thanks to the analytics dashboard. Source: Tech.co testing
Tips for Using WordPress
The WordPress dashboard includes a lot of little elements worth covering. Here’s a look at the most important tips and tricks to know:
- Comb through your “Settings” section for small tweaks
- You can add a Site Title and a tagline in Settings
- The “Reading” section of Settings lets you change your homepage from a static page to a collection of posts.
- Create a navigation bar on your website by clicking “Menus” in the “Appearance” section
- Add a caching plugin: This will save your website data after a vistor’s first sees your site, making it load faster for that visitor every time they show up after that.
- Add a data backup plugin: This will save a copy of your website, so you can recover your information if you ever lose access. “Jetpack” is a popular option for this.
- Separate the words in every URL or image file with dashes (website.com/it-looks-like-this). If you instead use underscores or no separation, search engines won’t be able to understand as well.
- Add alt text to your images. A short, simple description of the image is best. This helps screen readers understand what the image is, and it help search engines as well.
- Update often. Checking your plugins and pages regularly ensures that nothing has broken.
Is WordPress the Right Choice for Your Business?
WordPress is a great website builder for dipping your toe into the blogging world. It emphasizes blog posts, has a great commenting functionality, and doesn’t break the bank. However, our researchers found that it wasn’t the best overall.
Squarespace is better than WordPress in our direct comparison, since Squarespace is easier to use, offers unlimited storage (WordPress caps even its most costly plan at 200GB), and offers 24/7 live chat support across all plans (WordPress limits live chat support to Premium or higher plans).
When it comes to ecommerce, we rank two other website builders above Squarespace: Shopify is the best ecommerce website builder, for its stellar sales and reporting tools, while Wix takes second place for its design features.
Yes, WordPress offers a simple service, and anyone can build their own website in a day or two using the platform. However, you’ll need to know the steps involved, from picking the right plan to customizing a theme or adding a domain name.
WordPress is a fine website builder, particularly for bloggers. However, our researchers recommend going with other website builders if you’re trying to launch a business or ecommerce website: Shopify is the best, followed by Wix and Squarespace.
You can build any type of website you want in WordPress, but it’s not the only option available to newbies. We rate all the best website builders for beginners over here.
If you click on, sign up to a service through, or make a purchase through the links on our site, or use our quotes tool to receive custom pricing for your business needs, we may earn a referral fee from the supplier(s) of the technology you’re interested in. This helps Tech.co to provide free information and reviews, and carries no additional cost to you. Most importantly, it doesn’t affect our editorial impartiality. Ratings and rankings on Tech.co cannot be bought. Our reviews are based on objective research analysis. Rare exceptions to this will be marked clearly as a ‘sponsored’ table column, or explained by a full advertising disclosure on the page, in place of this one. Click to return to top of page